
Tuesday, September 1, 2015
Crustacean pattern for Bynoe flats
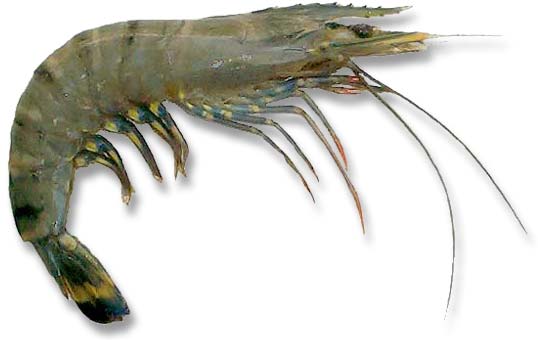
On the vastness of the world wide web.......... for months and months I have been eyeing off and drooling over some of the countless and most realistic life-like prawn/crab patterns I could find
Not just to cast to fish but most importantly to tie, tie and tie some more
When tying prawn and crab patterns - materials are always the issue,
Additionally, such patterns usually involve a plethora of a variety of materials
So when looking through your own tying cabinet............
It is about what do you have and what you don't have?
And if you don't just the right material - what can be used instead of that suggested material?
Critically, finding just the right bits and pieces to go with the other materials
As too, finding materials with just the right sort of movement or lack thereof
And there is the matter of colour and or translucence of a material to think of - particularly with prawn patterns
Additional considerations are the 'eat-me-quick' triggers like size, eyes, legs, carapace and claws
So after evaluating all these things and the materials I had on hand.....
Today I finally had a go at tying some, but prior to tying/making any fly, I like to organize my tying space.
First pack away everything but what is needed - materials and tools etc from last set of flies I had recently tied
Then getting together all the bits I need on the one piece of foam
Lined up and ready to be used
as many as possible materials as possible are pre-cut and prepared where required, also the right quantity of everything counted out, and don't forget hooks need to be debarbed
In this case of a prawn/crab pattern - the eyes are made. For this version, small black beads are heat welded on to 80lb mono. For the 'heat weld', I just melt tip of mono stalk, then the bead is pushed onto the melted blob on end while pushing the bead and molten blob of mono up against a slab of metal or base of tying vise to ensure it is secured.
If tying say 10 flies, I would feed twenty beads (two eyes for each fly - 2x10 = 20) onto a single long length of mono with a knot on end to stop them sliding off. The length of the mono would be enough for the twenty eye stalks and a couple extra just in case. Better then trying to pick up twenty stalks and twenty beads individually each time. After each 'heat weld', cut off stalk with side cutters from full length of mono to desired length, insert cut end into a piece of foam and make a few more. To finish off the eyes, give them a couple of coast of clear nail polish. Set aside to dry.
Then the claws were made - these claws are a short piece of rabbit zonker with 5 minute epoxy stroked along its length but more so at base with not too much at tip of fur so still some subtle movement.
Less than hour prep for all this - then ready to tie the fly.

This all makes the tying process far more faster to tie - more time efficient when you do the same thing repeatedly before putting down particular tools (or cleaning fingers after stroking epoxy onto the claw zonker).
So with all all credit given to the multiple and highly talented fly tyers on the web, who have inspired me with their countless and very impressive prawn/crab patterns
But in the end - primarily based on the actual materials I actually had on hand that I felt worked worked together........
This is the pattern that ended up being tied........ part crab, part prawn, part lobster, part crayfish
A mutant of sorts!!!


Can hardly wait to test it out on the Barramundi, Threadies, and Blue Bastards that inhabit and frequent the flats of Darwin and Bynoe Harbours
So here's the sequence of how I tied it
- Lead dumbbell eyes tied in at the hook eye
- A touch of pink ice dubbing tied in at the hook bend
- Then rabbit zonker either side of hook shank at hook bend - using shoulder of pink ice dubbing tie in point to flare the zonker. may require a few judicious and purposeful wraps of thread to assist this flaring.
- Some pearl ice dubbing all around hook shank at the claw tie in point but only a whisper of this ice dubbing material - not too much at all
- Turn fly over in vise so hook point is up
- Then rubber leg material - in this case grizzle rubber legs
- Then eyes on stalks either side of hook shank with black beads half way along claw length
- Then tie in Flash'n'Slinky material in 'shrimp' colour for this version - keep material on the to top and the sides of pattern as it would sit on the mud flats
- Finally, tie in some grizzle craft fur at hook eye - ensuring material lays along the top of the fly
Like always - tie ten of them and go SWOFFING

I have named it the Bynoe P&C fly (basically a Bynoe Prawn and Crab fly)
Hopefully I can entice some flats inhabitants in Bynoe Harbour to like the pattern as much as I do
(even though a few seem to have too much bulk in their claws)
Heading to Bynoe on weekend - so here's hoping the opportunity is fruitful
Enjoy life - go fly fishing, better still go SWOFFING!
Richard
No comments:
Post a Comment